How to Paint Wood: Paint Types, Primers, and Techniques That Last
Affiliate disclosure: As an Amazon Associate, WoodyMan Reviews earns from qualifying purchases. If you buy through links on this page, we may earn a commission at no extra cost to you. How this works.
Painting wood well isn’t about the brush technique — it’s about three decisions you make before you open the can: the right paint for where the wood lives, the right primer under it, and honest surface prep. Get those right and a paint job lasts a decade; get them wrong and it peels in a season, no matter how carefully you cut in.
This hub walks through all three, then points you to our dedicated guides for specific jobs — siding, floors, decks, and more. The single most important idea to carry through it: match the paint to the environment. Interior trim, a porch floor, and sun-beaten siding are three different problems that want three different products.
We earn a small commission from the Amazon links below, at no extra cost to you — see our affiliate disclosure.
Quick picks by job
| Product | Best for | |
|---|---|---|
| Zinsser Perma-White Exterior | Exterior siding & trim (mildew-proof) | Check price |
| KILZ Porch & Patio Enamel | Floors, porches, stairs (high-traffic) | Check price |
| KILZ Adhesion Primer | Bonding primer for glossy/bare wood | Check price |
These three cover the most common wood-painting jobs, but the right paint depends on the surface — the guides linked throughout drill into each. For exterior siding specifically, see our best exterior paint for wood siding; for porch and floor work, best floor paint and best paint for wooden floors; for a whole house exterior, best outdoor house paint.
Types of wood paint
Acrylic / latex (water-based)
The default for most wood painting today. 100% acrylic latex stays flexible (so it moves with the wood instead of cracking), breathes so moisture escapes, resists UV, and cleans up with water. It’s the right choice for siding, trim, fences, furniture, and most interior work. When in doubt, this is the answer.
Oil-based (alkyd)
Oil paint flows out to a hard, smooth, durable film — traditionally prized for trim, doors, and cabinets where you want a glassy finish. The downsides: strong fumes, slow drying, solvent cleanup, yellowing over time, and tightening VOC rules. Still useful on high-wear interior wood, and oil-enriched water-based paints (like barn-and-fence formulas) grip weathered exterior wood well.
Enamel / cabinet & porch paint
“Enamel” means a paint that dries especially hard and washable — ideal for high-touch, high-wear surfaces like cabinets, doors, trim, stairs, and porch floors. Porch-and-floor enamels (such as KILZ Porch & Patio) are formulated to take foot traffic and scuffing that would wear ordinary wall paint through.
Chalk & milk paint
Decorative, matte finishes for furniture and craft projects. Chalk paint grips most surfaces with minimal prep and distresses beautifully but needs a wax or topcoat to seal it. Milk paint gives an old-world, sometimes chippy look. Neither is meant for exterior or high-wear structural wood.
Spray paint & sprayers
For spindles, lattice, louvered shutters, and intricate furniture, spraying lays down a smoother, faster coat than a brush can. Aerosol enamels suit small projects; an HVLP or airless sprayer suits big ones. Mind overspray and always work in ventilation.
Primer: the step people skip and regret
Primer is not optional on most wood. It seals the porous surface so the topcoat doesn’t soak in unevenly, it blocks stains, and above all it makes the paint bond so it doesn’t peel. Which primer:
- Bare or glossy wood: a bonding primer like KILZ Adhesion grips where plain primer would peel.
- Cedar, redwood, or knotty pine: these bleed tannin (brown stains) and knot resin through paint — use a stain-blocking primer made for it, or the stains ghost through your finish.
- Previously painted, sound wood: a self-priming paint can often go straight over it; spot-prime any bare areas.
Prep: where the job is won or lost
- Clean. Wash off dirt, grease, and (outdoors) chalk and mildew. Let it dry fully — painting damp wood is the number-one cause of peeling.
- Scrape and sand. Remove loose or flaking old paint, then sand to dull the gloss and smooth the surface so the primer can grip. A sander sized to the job makes this fast — a random orbital for flat faces, a detail sander for mouldings and panels.
- Fill and caulk. Fill holes and dents; caulk gaps on trim and siding after priming.
- Prime, let it cure, then paint.
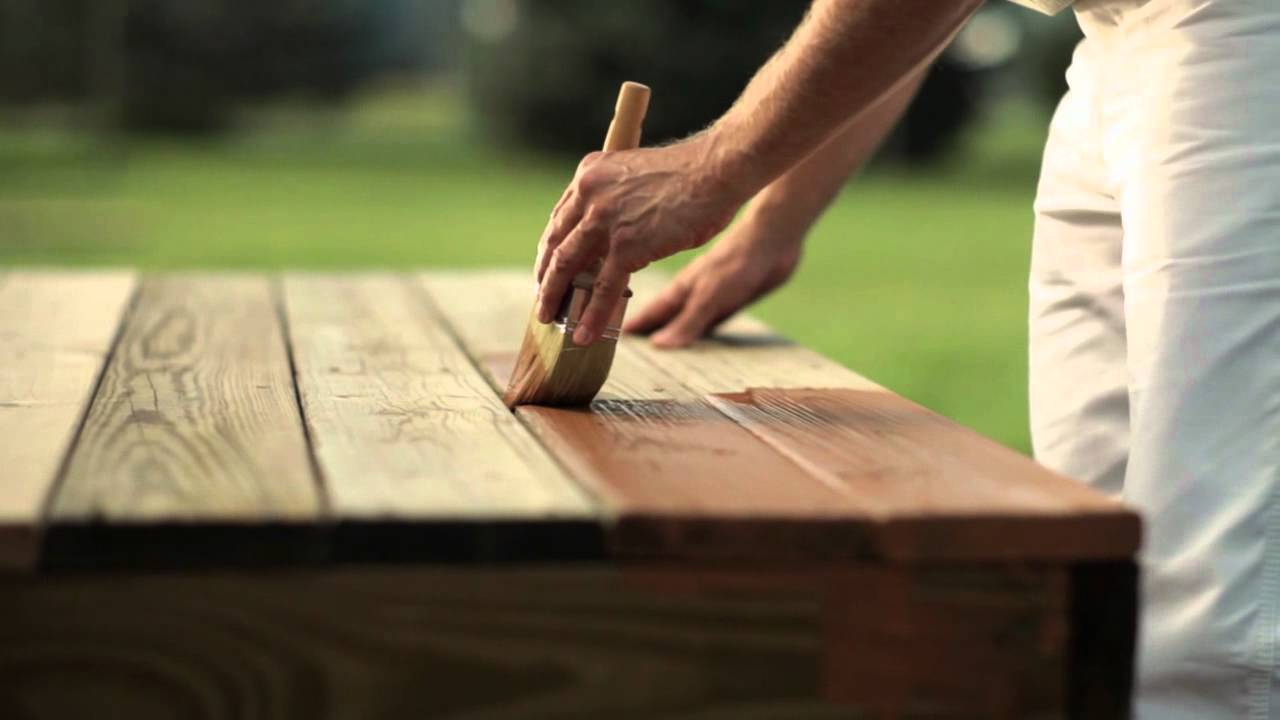
Application: brush, roll, or spray
- Brush for cutting in, trim, and detail. A quality synthetic-bristle brush is best for water-based paint.
- Roll for large flat areas — siding fields, doors, big furniture panels — then “tip off” with a brush for a smooth look.
- Spray for intricate or louvered pieces and big fast jobs. Back-brush sprayed exterior coats into the wood for adhesion.
Two thin coats always beat one thick one: they level better, dry properly, and build a tougher film. Paint in dry, mild conditions — roughly 50–85°F, out of direct blazing sun, with no rain coming for 24 hours on exterior work.
Sheen: how shiny should it be?
- Flat/matte hides surface flaws but is harder to clean — okay for low-touch or rustic looks.
- Satin/eggshell is the everyday sweet spot: some sheen, washable, forgiving on wood.
- Semi-gloss/gloss is the most durable and scrubbable — the standard for trim, doors, cabinets, and anything that gets touched or needs wiping.
Higher gloss = more durable and washable, but it also spotlights every imperfection, so prep matters more as the sheen goes up.
Frequently Asked Questions
What kind of paint is best for wood?
For most wood, 100% acrylic latex — flexible, breathable, UV- and water-resistant, easy cleanup. Use a hard enamel for high-wear surfaces (cabinets, doors, trim, floors), and match exterior siding to a durable mildew-resistant acrylic. The right choice depends on where the wood lives.
Do I have to prime wood before painting?
Almost always, yes. Primer seals porous wood, blocks stains and tannin bleed, and — most importantly — makes the topcoat bond so it won’t peel. Bare, glossy, or stain-prone woods especially need the right primer. Only sound, previously painted wood can sometimes take a self-priming paint directly.
Can I paint over stained or varnished wood?
Yes, with prep: clean it, sand to dull the gloss (or use a de-glosser), then apply a bonding primer so the new paint grips the slick surface. Skipping that step is why paint peels off varnished trim and furniture.
How many coats of paint does wood need?
Two thin topcoats over primer is the standard — it builds even color and a durable film. One coat rarely covers or wears well on wood.
What’s the most durable paint finish for wood?
A semi-gloss or gloss enamel (oil or a hard acrylic enamel) gives the toughest, most washable film — which is why it’s used on trim, doors, and cabinets. For floors and porches, a dedicated porch-and-floor enamel handles the traffic.
Explore the painting cluster
Ready for a specific project? See best exterior paint for wood siding, best outdoor house paint, best floor paint, and best paint for wooden floors. Refinishing rather than repainting? Try best wood polish for floors or strip first with the best paint remover for a wood deck. Protecting bare wood outdoors? Start with the best wood preservatives. Updating interior woodwork? See how to make wood trim look modern.