How to Use a Mouse Sander: Grits, Technique, and Pad Care
Affiliate disclosure: As an Amazon Associate, WoodyMan Reviews earns from qualifying purchases. If you buy through links on this page, we may earn a commission at no extra cost to you. How this works.
The whole technique in three lines: let the pad sit flat, let the tool's own weight do the pressing, and keep it moving with the grain. Work corners with the pointed tip, not the pad's edge. Change grits instead of pressing harder. A mouse sander is a finesse tool - the iron-shaped pad exists to reach the spots bigger sanders can't, and nearly every way people ruin work with one comes down to treating it like a grinder.
Setup: pads and grits
Mouse pads attach with hook-and-loop - press them on, aligned to the point, and they're ready. Two things worth knowing before you buy pads:
- Pad shapes aren't universal. BLACK+DECKER's Mouse shape is the de-facto standard with cheap third-party pads everywhere; some budget brands use their own dimensions, so check fitment before ordering a 50-pack.
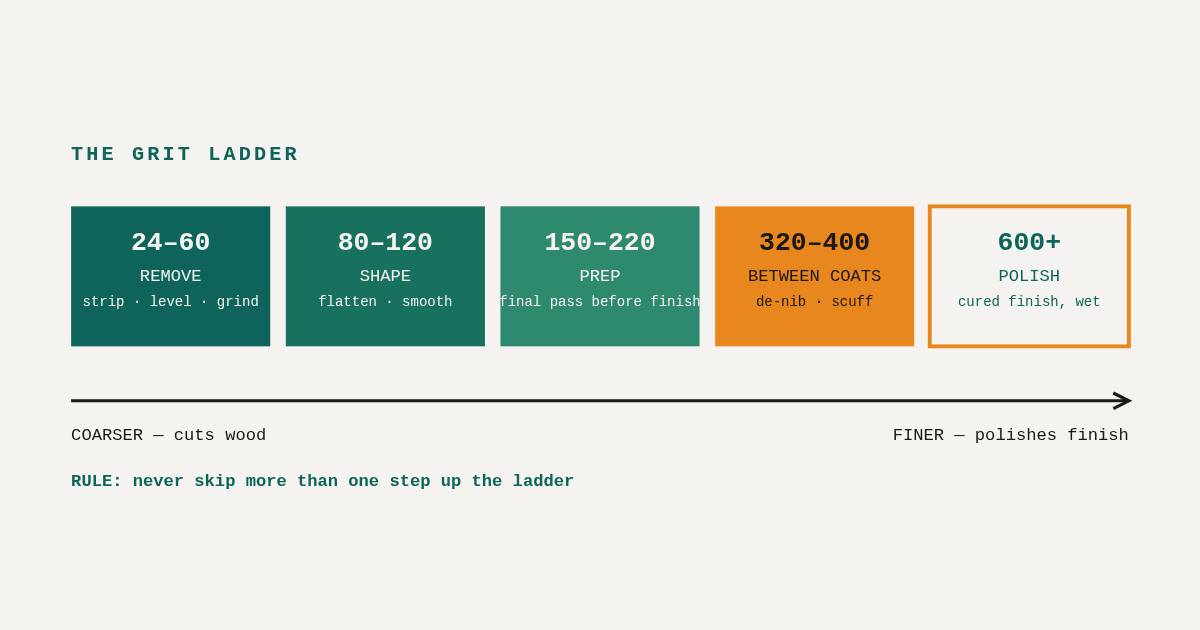
- Grit choice follows the same logic as any sanding: 80 for removing material or old finish, 120-150 for smoothing, 220 for finish prep. Most mouse work is detail cleanup, so you'll live at 120-220. If 80 grit isn't cutting it, the job belongs to a bigger sander - see the sanders hub for which one.
Many mouse sanders include a detail finger - a slim snap-on nose extension. It's for louvers, spindles, and slots; swap it in rather than jamming the main pad where it doesn't fit.
Technique: the no-pressure rule
Switch on before touching the surface, land flat, and move in steady, overlapping strokes along the grain. The orbital pad is vibrating thousands of times a minute - your job is only to steer it.
Pressing down feels productive and does the opposite: it stalls the orbit, heats the pad, glazes the paper, and leaves swirl scratches that show up the moment stain or gloss paint hits. If material isn't coming off fast enough, drop to a coarser grit - never push.
Three more habits that separate clean results from chewed ones:
- Keep the pad flat. Tilting onto an edge to "dig in" concentrates the whole tool's action on a fingernail of paper - it burns through the pad corner and gouges a dip in the wood.
- Use the tip for corners. The pointed nose reaches into a 90° corner flat, which is the entire reason this tool exists. Slide it in along one wall of the corner, then the other; don't grind the point in place.
- Don't park it. A stationary running sander digs a shallow crater you'll only notice after finishing. Keep it drifting, always.
Dust, vibration, and pacing
Empty the dust canister when it's half full - past that, collection basically stops. If your model takes a vacuum hose, use it; detail sanding happens close to your face.
Mouse sanders buzz. High-frequency vibration numbs fingers on long sessions, so take five-minute breaks each half hour - your control degrades before you notice it. (Premium detail sanders differ mainly in exactly this: the Milwaukee M12 FUEL runs a true orbital action that's dramatically smoother on both hands and finish.)
What a mouse sander is for - and not for
For: furniture details, chair spindles and legs, window sills and muntins, cabinet-door profiles, baseboards and trim in place, stair balusters, craft work, and paint prep in tight interior corners.
Not for: table tops, doors, decks, or anything measured in square feet. The small pad makes big flats slow and wavy, because no one holds a small pad perfectly flat for that long. Flats belong to a random orbital or sheet sander.
If you're still choosing the tool itself, we ranked every current model worth buying in the best mouse sanders guide - the BLACK+DECKER BDEMS600 is the pick for most people - and the broader detail sander guide covers the category beyond the mouse shape.
FAQ
Why does my mouse sander leave swirl marks? Pressure, worn paper, or dust trapped under the pad. Lighten your grip, change paper more often than feels necessary, and clear dust as you go. Swirls from cheap vibrating pads only fully disappear at finer grits - finish at 220 before staining.
Can I sand paint off with a mouse sander? Small areas, yes - 80 grit and patience. Whole pieces go much faster with a random orbital; grit sequence is in our paint removal guide.
Why do my pads wear out at the tip first? Because the tip is doing all the corner work. Rotate technique - do flat sections with the pad's body - and buy pads in bulk; tips always go first.
Wet sanding with a mouse sander? No - these are dry-sanding electric tools. Wet sanding is a hand-block job.