What Grit Sandpaper to Remove Paint from Wood (Without Gouging It)
Affiliate disclosure: As an Amazon Associate, WoodyMan Reviews earns from qualifying purchases. If you buy through links on this page, we may earn a commission at no extra cost to you. How this works.
Short answer: start at 60-80 grit to cut through the paint, switch to 120-150 once you're mostly at bare wood, and finish at 180-220 before repainting or staining. Start coarser than 60 only for thick, multi-layer paint on flat, tough surfaces - 40 grit removes paint fast but leaves scratches deep enough that you'll spend longer erasing them than you saved. And before any of this: if the paint might predate 1978, test it for lead first.
Stage 1 - cut the paint (60-80 grit)
Coarse paper's job is to get through the film, not to reach perfection. Use 60 on thick or stubborn coatings, 80 on one or two well-adhered layers. Let the abrasive do the work: pressing harder doesn't cut faster, it heats the paint until it gums into the paper. When shiny paint flecks stop coming off and you're seeing mostly wood, this stage is over - every extra pass at 60 grit is a scratch you'll have to remove later.
On a power sander, coarse grits remove wood fast too. Keep the machine moving, keep it flat, and go easy near edges and corners, which round over in seconds.
Stage 2 - clean up (120-150 grit)
Medium grit clears the last paint from the grain and - just as important - erases the scratches stage 1 left. Work along the grain. If paint is stuck deep in open-grained wood like oak, it's faster to let 120 handle it than to keep grinding with 60, which tears the grain around it.
Stage 3 - make it finish-ready (180-220 grit)
Repainting? Stop at 180 - paint actually bonds better to a surface with a little tooth. Staining? Go to 220, because stain shows every scratch that paint would hide. Either way, vacuum and wipe with a tack cloth before anything goes back on.
When sanding is the wrong tool
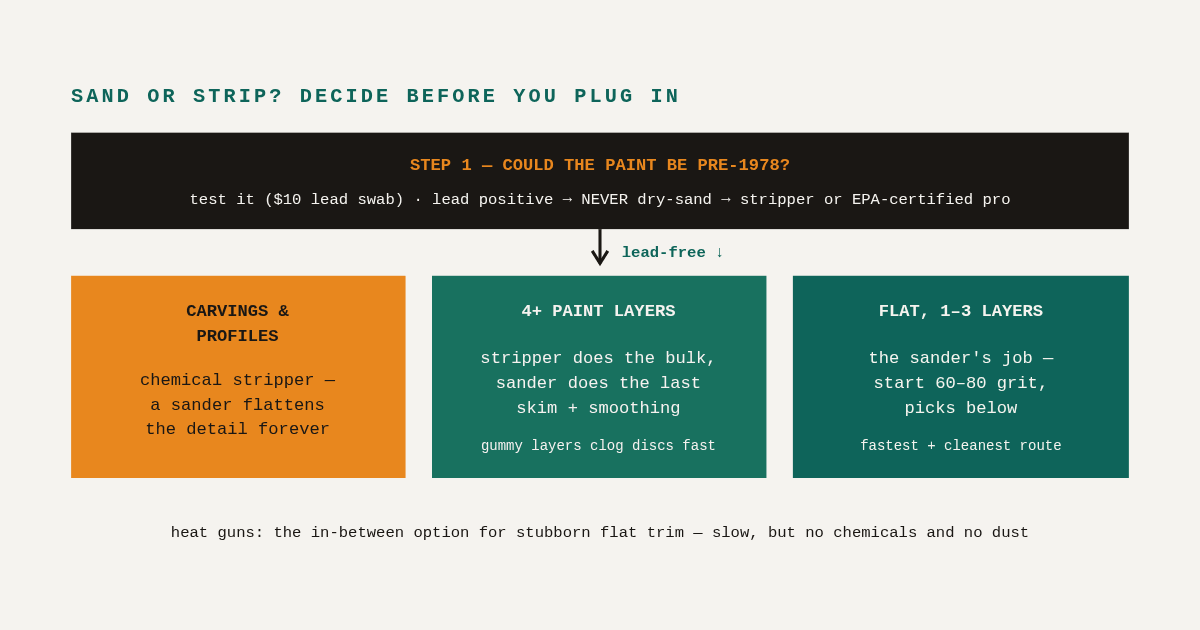
Sanding wins on flat, open surfaces: doors, table tops, siding, deck boards. It loses on carved profiles, turned legs, mouldings, and anything with more than three or four paint layers - there, a chemical stripper does in one application what sandpaper does in an afternoon, without flattening the details. We compared the options in our paint remover guide. The usual pro move is both: strip the bulk chemically, then a light 120 → 180 sand to finish.
The lead rule, once more: paint applied before 1978 may contain lead, and sanding turns it into exactly the dust you don't want in your lungs or your yard. A $10 swab test settles it. If it's positive, don't dry-sand - use a stripper or call it in.
The right machine for the job
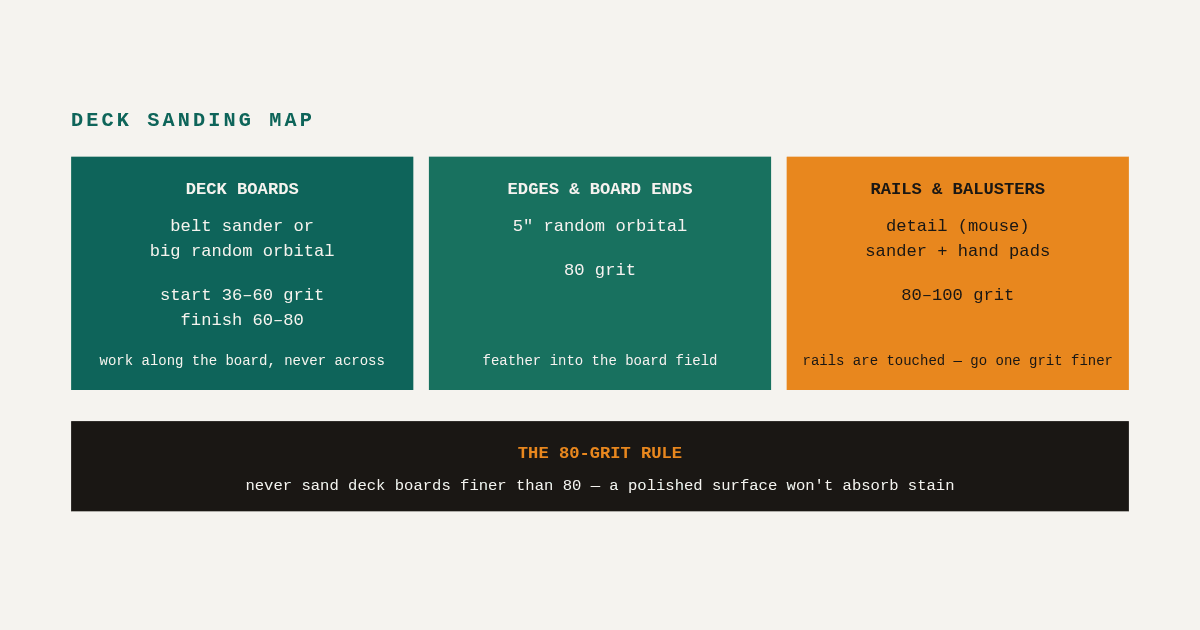
For flat surfaces, a random orbital like the Bosch ROS20VSC is the paint-removal workhorse - aggressive enough at 60 grit, swirl-free at 220 with the same tool. For big exterior jobs (siding, decks) there are stronger options; we ranked them in the exterior paint removal sander guide. For everything sanders, start at the sanders hub.
FAQ
Can I remove paint with 40 grit? You can, and pros do on thick exterior build-ups - but on furniture-grade work the deep scratches and edge burn-through usually cost more time than the coarse paper saves.
Why does my sandpaper clog immediately? The paint is soft - either it's latex in the sun, or friction heat is melting it. Slow down, lighten pressure, or switch to a stripper. Stearated ("no-clog") paper helps too.
Do I have to get every speck of paint out of the grain before repainting? No - solid paint hides sound residue fine. You do have to get it all out before staining, which is why stain projects usually justify chemical stripping.