How to Sand Furniture Without Stripping It (Scuff Sanding, Done Right)
Affiliate disclosure: As an Amazon Associate, WoodyMan Reviews earns from qualifying purchases. If you buy through links on this page, we may earn a commission at no extra cost to you. How this works.
Short answer: if you're painting over an existing finish, you don't need to strip or sand to bare wood at all. A "scuff sand" - one light pass with 120-220 grit that dulls the sheen without cutting through the finish - gives paint everything it needs to grip. The full strip-to-bare-wood routine is only mandatory in two cases: you want to stain the wood (stain can't penetrate any remaining finish), or the old finish is failing - peeling, flaking, or alligatored - so anything applied over it would peel right along with it.
The scuff sand, step by step
- Clean first, sand second. Wipe the piece down with a degreaser or diluted TSP substitute. Sanding over furniture polish or kitchen grime just drives it into the surface - and paint won't stick to silicone no matter how much you sand.
- Pick the grit by the finish. Glossy polyurethane or lacquer: start at 120-150. Already-matte or previously painted: 180-220 is plenty. You are breaking the sheen, not removing material.
- One light pass, with the grain, everywhere the new paint goes. Even pressure, long strokes. On flat panels a sander makes this a two-minute job; on profiles and carved edges use a folded sheet or a sanding sponge, which conforms to curves.
- Stop when it's uniformly dull. Shiny patches = paint-adhesion failures waiting to happen. Dull haze over the whole surface = done. If you cut through to bare wood in spots, that's fine for paint; just prime those spots so they don't flash through the topcoat.
- Vacuum, then tack-cloth. Dust is the other great enemy of adhesion.
Then prime (adhesion primer on anything glossy or previously lacquered) and paint.
Which sander for furniture scuffing
Flat tops and side panels go fastest with a small random orbital or a mouse-style detail sander - the BLACK+DECKER BDEMS600 has been our tight-spots pick across several guides because its pointed pad gets into the corners of panel doors and drawer fronts that round pads can't. We've ranked the full field, from budget to premium, in the furniture sander guide - and if you're restoring rather than repainting, the furniture restoration sander guide covers gentler setups.
Skip belt sanders entirely for this job. They're for stock removal; on veneered or delicate furniture they'll punch through the surface before you can react.
The no-sand alternatives, honestly
- Liquid deglosser ("liquid sandpaper") chemically dulls the finish so paint can grip. It works on sound finishes and saves real time on ornate pieces - but it does nothing to smooth chips, drips, or brush marks, which sandpaper would.
- "No-prep" chalk-style paints genuinely adhere better than regular paint on unsanded finishes, but on glossy or frequently-handled surfaces (table tops, chair arms) they still last dramatically longer over a quick scuff. Ten minutes of sanding buys years of durability.
When only a full strip will do
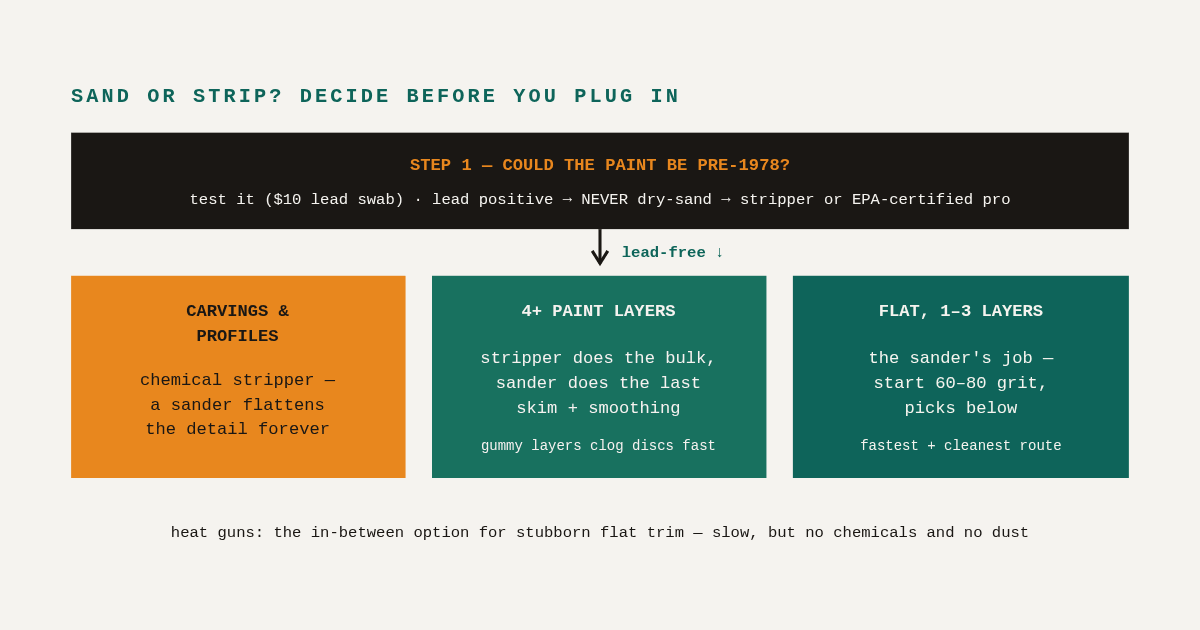
Staining, as covered - and failing finishes. If the old finish is lifting, cracking through to wood, or coming off on the degreaser rag, nothing you apply over it will hold. That's chemical-stripper territory, followed by a normal sanding sequence - our paint-removal grit guide covers exactly that, and the sanders hub has the full tool rundown.
One caution before you sand any old painted piece: paint from before 1978 can contain lead. A cheap swab test first; if positive, no dry sanding.
FAQ
Do I really not need to remove the old varnish before painting? Really. Paint needs mechanical grip, not bare wood. Every professional refinisher paints over scuffed, sound finishes daily.
What grit for scuff sanding before chalk paint? 220 is enough - you're helping an already-grippy paint, not rescuing a slick one.
Can I scuff sand with a power sander, or is hand-only safer? Power is fine on flats - lowest speed, fine grit, keep it moving. Go hand-only on veneer edges, curves, and anything with detail you'd rather keep.