Woodworking Vises: Types, Sizing, and 5 Vises Worth Buying
Affiliate disclosure: As an Amazon Associate, WoodyMan Reviews earns from qualifying purchases. If you buy through links on this page, we may earn a commission at no extra cost to you. How this works.
A woodworking vise is the thing that turns a table into a workbench — it holds a board still so both your hands are free to saw, plane, chisel, or sand. But “woodworking vise” covers a few distinct tools, and buying the wrong one is a common, frustrating mistake. Three decisions get you to the right vise:
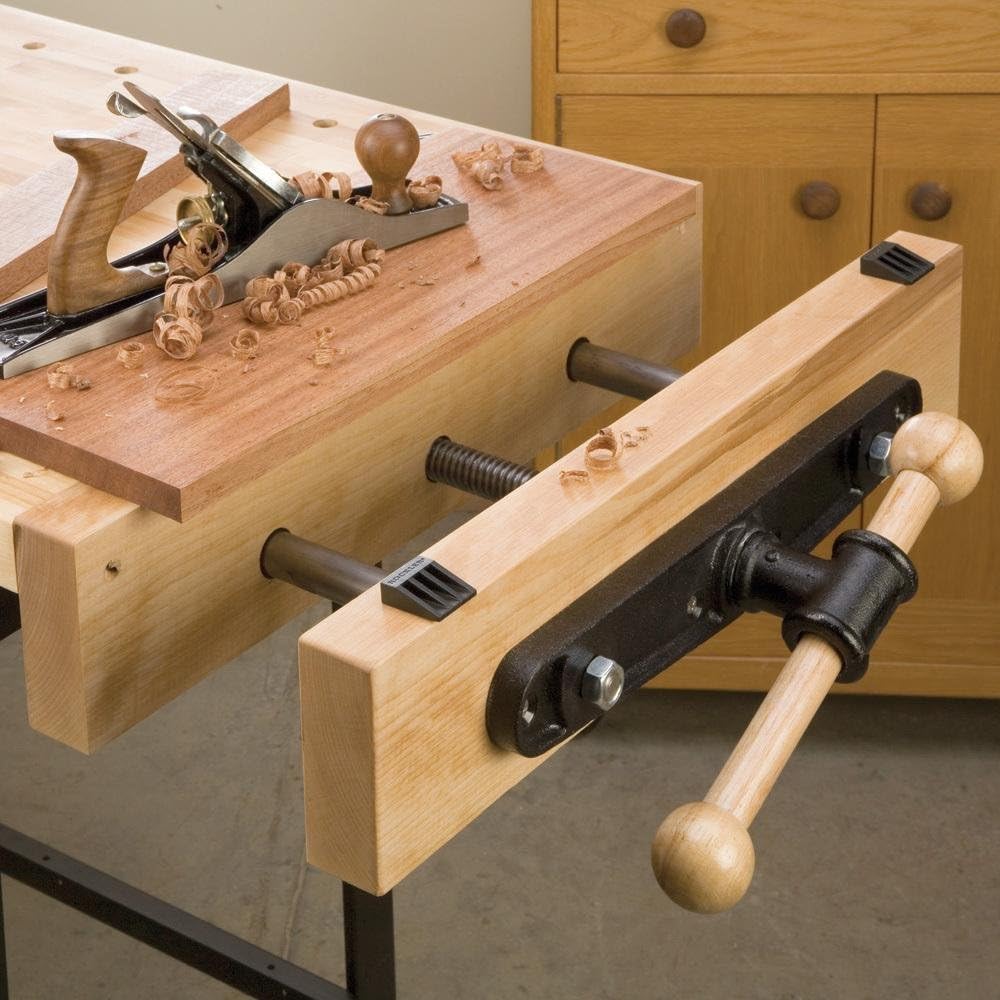
- Front (face) vise or tail (end) vise? A front vise mounts on the long front edge and grips boards for sawing and planing — it’s the one everyone needs first. A tail vise lives at the end of the bench and, working with bench dogs, clamps a board flat on top of the bench for surface work. Many benches eventually have both.
- How big? Jaw width and how far the jaws open set the size of stock you can hold.
- Quick-release or not? A quick-release lever lets you slam the jaws open and shut in one motion instead of cranking the screw.
Below is a plain guide to the types and how to size one, plus five vises that represent the good, honest choices at each job.
We earn a small commission from the Amazon links below, at no extra cost to you — see our affiliate disclosure.
5 woodworking vises worth buying
| Vise | Best for | Woody Rating | |
|---|---|---|---|
| 1. Yost M9WW 9″ Rapid Action | Best all-round front vise | 9.1/10 [Editor’s Choice] | Check price |
| 2. Eclipse Quick Release 7″ | Best quick-release classic | 8.9/10 | Check price |
| 3. Yost 10047 Ductile Iron 10″ | Best heavy-duty | 8.7/10 | Check price |
| 4. Yost F10WW Front Vise 10″ | Best value front vise | 8.3/10 | Check price |
| 5. Rockler Quick-Release End Vise 12″ | Best tail/end vise | 8.2/10 | Check price |
1. Yost M9WW 9″ Rapid Action — Editor's Choice
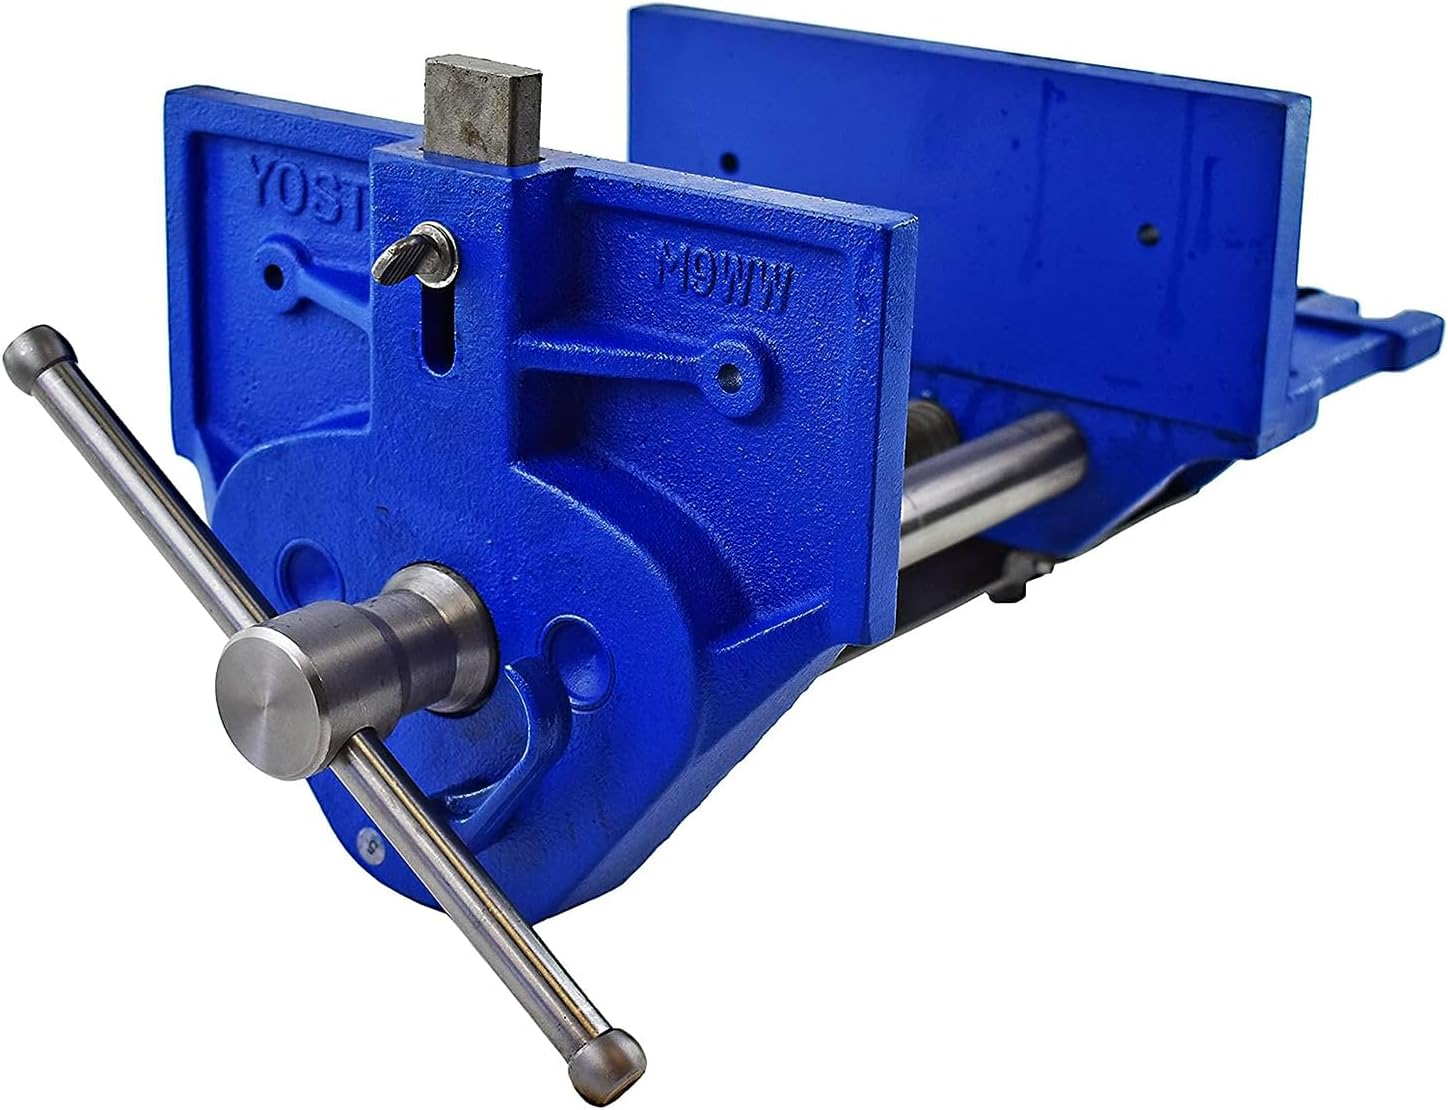
Best for: the one front vise most bench builders should buy.
The M9WW hits the sweet spot for a general-purpose front vise: a wide 9″ jaw, a roomy opening, and a rapid-action (quick-release) lever that disengages the screw so you can shove the jaw to length and then take up the last bit with a turn. It’s cast iron with a buttress-thread screw that clamps hard, and the jaws are predrilled so you can bolt on wooden faces to protect your stock. It’s a lot of clamping capacity for the money, and it’s the vise most people should mount on the front-left of a new bench.
| Pros | Cons |
|---|---|
| ✅ Wide 9″ jaw + quick-release lever | ❌ Heavy — mount to a solid bench |
| ✅ Strong buttress-thread screw | ❌ Wood jaw faces not included |
| ✅ Predrilled for wooden jaw liners | |
| ✅ Great capacity for the price |
2. Eclipse Quick Release 7″ — Best Quick-Release Classic
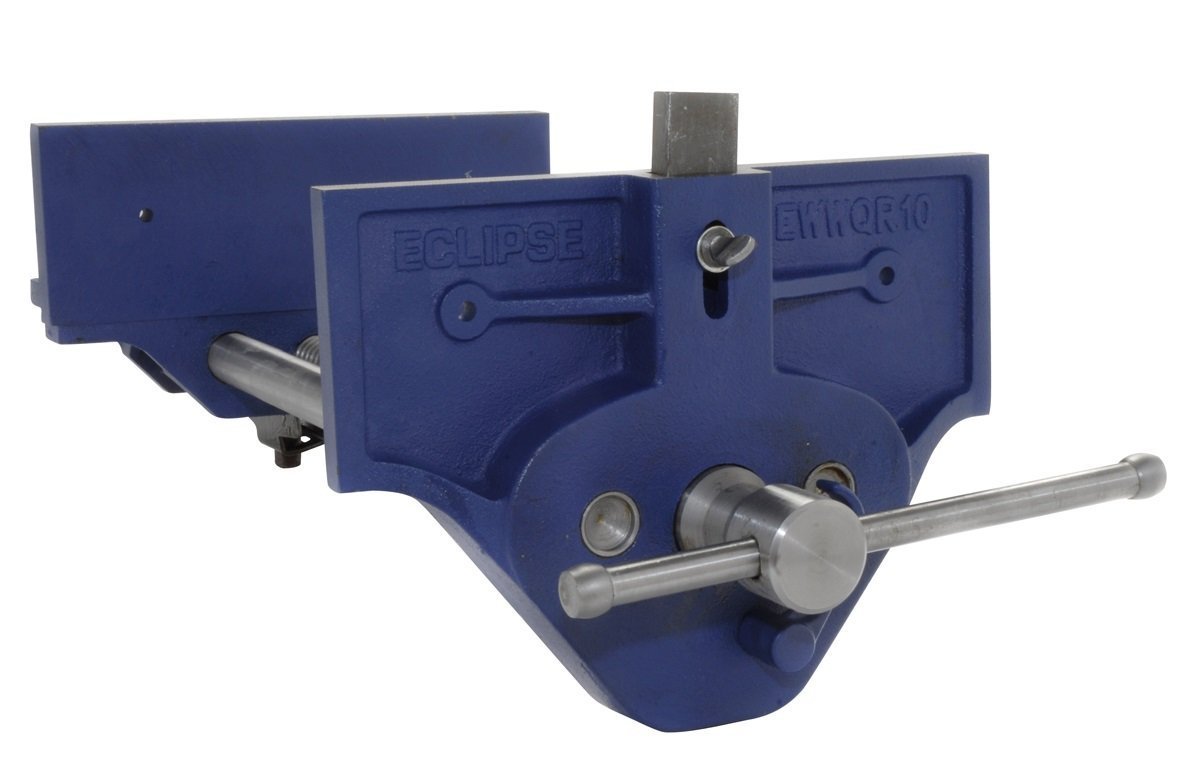
Best for: traditionalists who want the time-tested English-pattern quick-release vise.
The Eclipse is the pattern a lot of woodworkers grew up with: a 7″ quick-release front vise in heavy cast iron and steel, with a front lever that trips the split nut so the jaw slides freely. Twin ¾″ guide rods keep it from racking, the main screw is the same ¾″ heft, and the jaw faces are predrilled for wood liners. Slightly narrower jaws than the Yost M9WW, but the build quality and the crisp quick-release action are why it stays a benchmark. A great choice if you like proven, no-surprises hardware.
| Pros | Cons |
|---|---|
| ✅ Proven English-pattern quick-release | ❌ Narrower 7″ jaw than the M9WW |
| ✅ Heavy cast iron + twin guide rods | ❌ Add your own wood faces |
| ✅ Crisp lever action, minimal racking | |
| ✅ Predrilled jaws |
3. Yost 10047 Ductile Iron 10″ — Best Heavy-Duty
Best for: big benches and big stock — doors, thick slabs, long boards.
If you build heavy, the 10047 gives you a 10″ jaw and ductile iron construction, which is tougher and more shock-resistant than gray cast iron (it flexes rather than cracking under abuse). The rapid-action release handles the wide opening quickly, and there’s simply more jaw to spread clamping pressure across a wide board. It’s overkill for a modest bench and it’s a chunk of metal to mount, but for a serious workbench that sees large work, it’s the confidence pick.
| Pros | Cons |
|---|---|
| ✅ Wide 10″ jaw for large stock | ❌ Overkill for a small bench |
| ✅ Ductile iron — tougher than cast | ❌ Heavy to handle and mount |
| ✅ Rapid-action release |
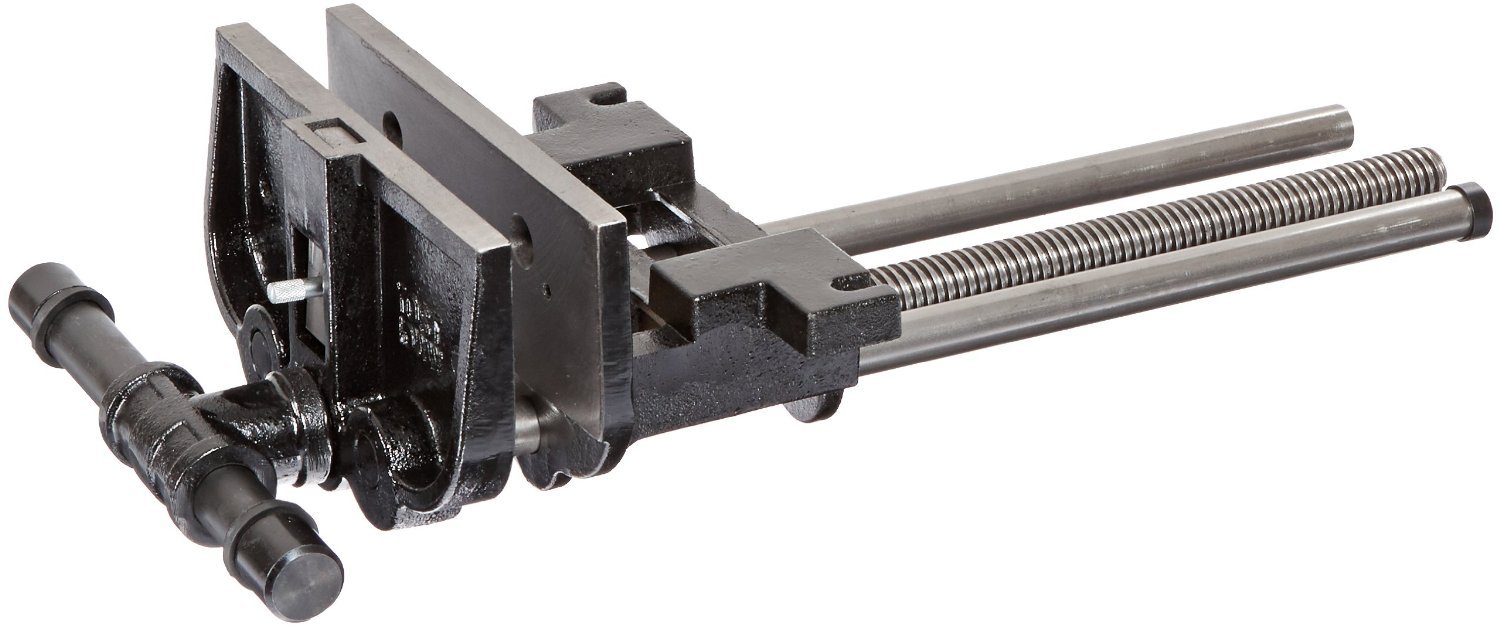
4. Yost F10WW Front Vise 10″ — Best Value Front Vise
Best for: getting a wide front vise on a budget.
The F10WW is the straightforward, no-quick-release version — a 10″ cast-iron front vise with a solid steel main screw. You crank it open and shut (no lever), which is a little slower but also one fewer mechanism to wear out, and it costs less than the rapid-action models. Wide jaws, honest build, predrilled for wood faces. For a first bench where every dollar counts and you don’t mind a few extra turns of the handle, it’s a lot of vise for the price.
| Pros | Cons |
|---|---|
| ✅ Wide 10″ jaw at a low price | ❌ No quick-release — crank to open |
| ✅ Solid steel main screw | ❌ Wood faces not included |
| ✅ Simple, durable, fewer moving parts |
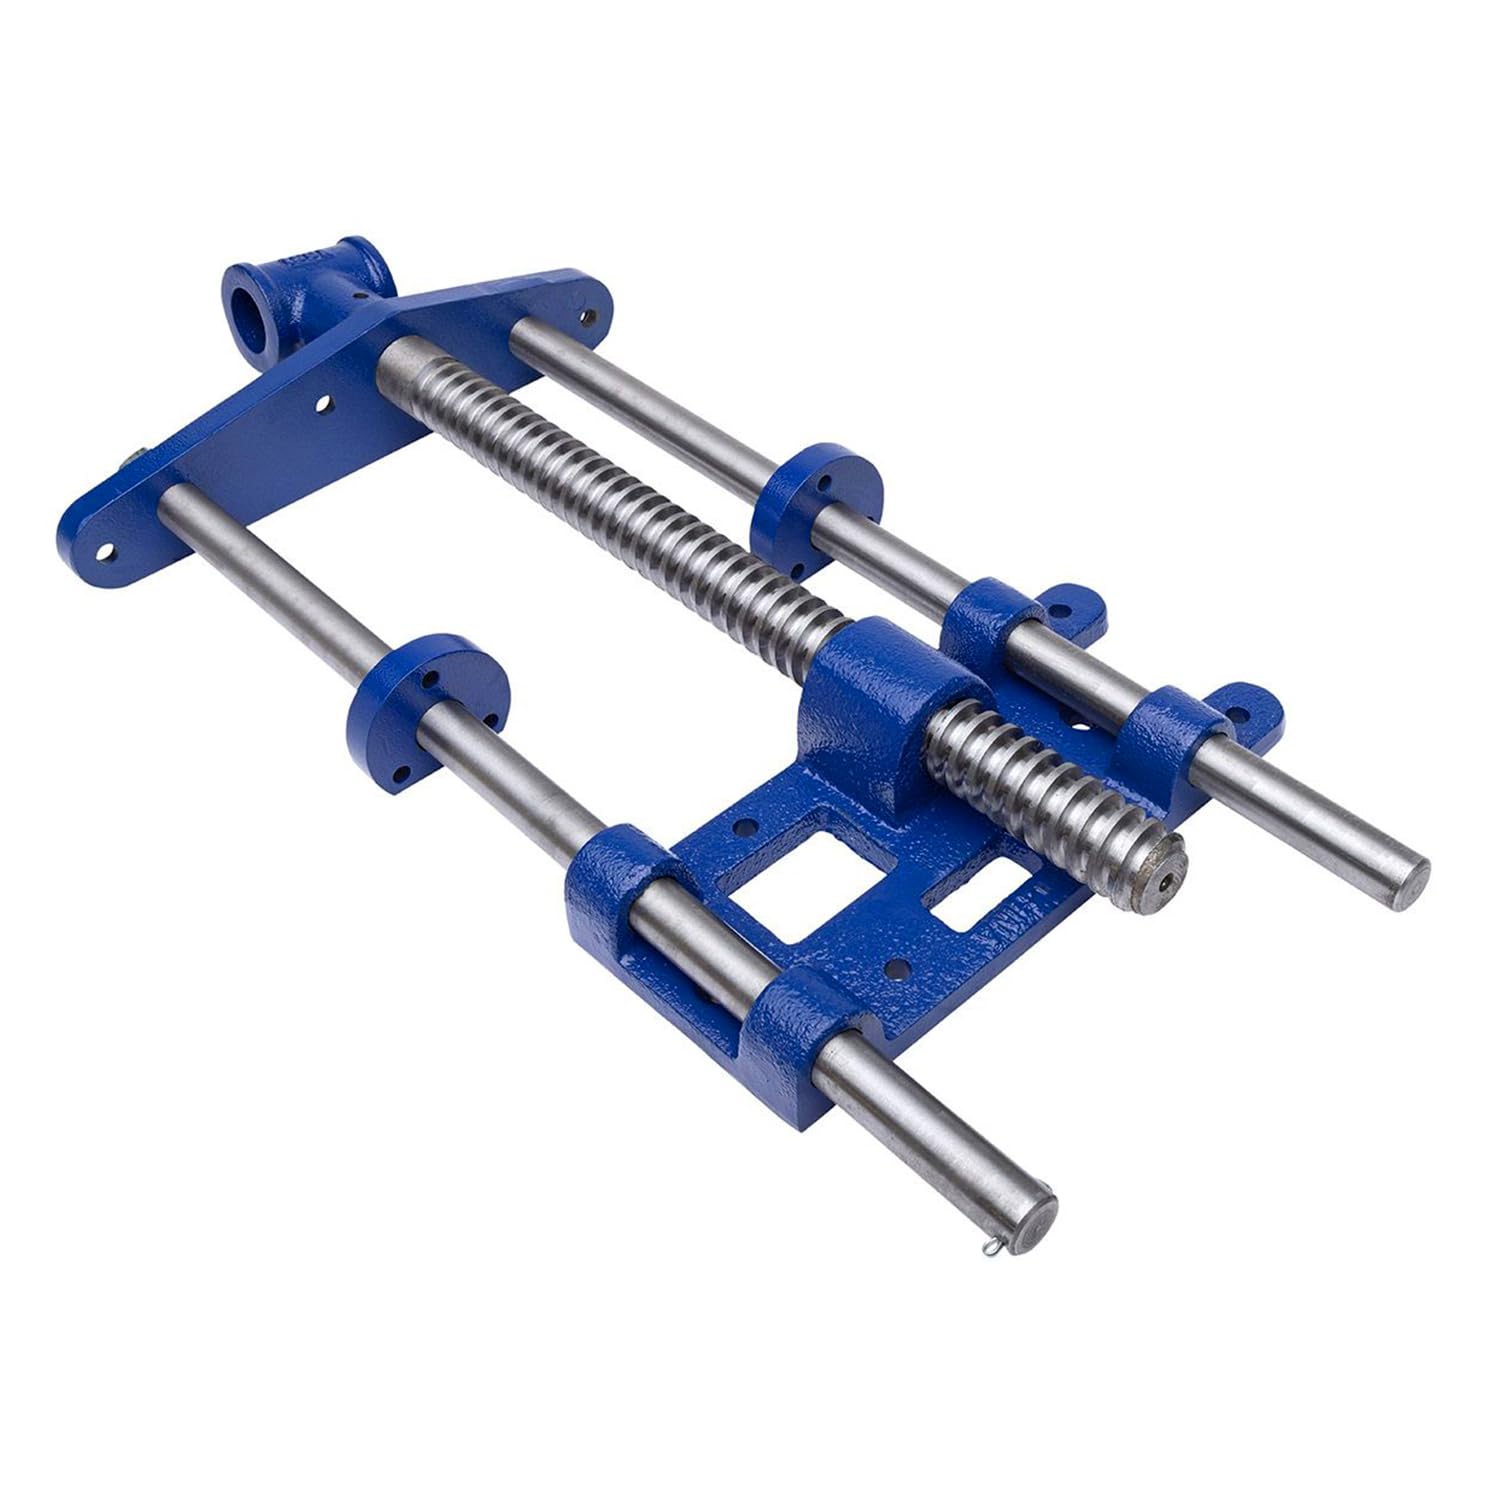
5. Rockler Quick-Release End Vise 12″ — Best Tail/End Vise
Best for: adding dog-hole clamping to hold boards flat on the benchtop.
This is the other vise — a tail (end) vise for the end of the bench. Paired with bench dogs, it clamps a board flat on top of the bench between a dog in the vise and a dog in the benchtop, which is how you hold a panel still to hand-plane or sand its face. The 12″ quick-release mechanism opens fast to span long stock, and it’s the natural second vise once you have a front vise handling edge work. If you do a lot of surface planing or sanding, a tail vise transforms the bench.
| Pros | Cons |
|---|---|
| ✅ Holds boards flat via bench dogs | ❌ Needs dog holes in the bench |
| ✅ Quick-release, wide 12″ span | ❌ A second vise, not your first |
| ✅ Transforms surface work |
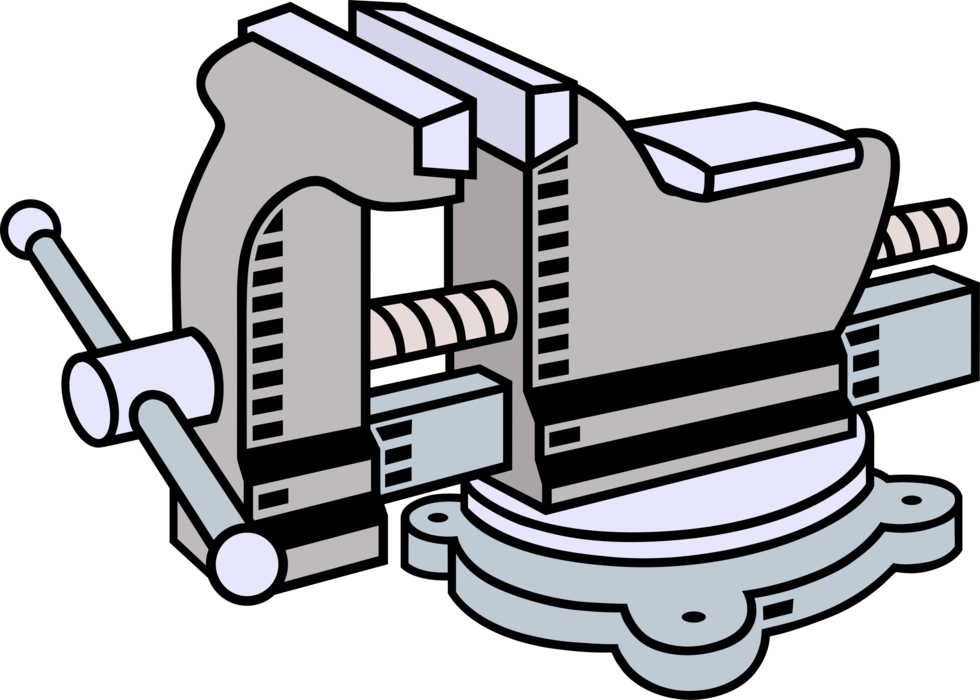
Types of woodworking vise
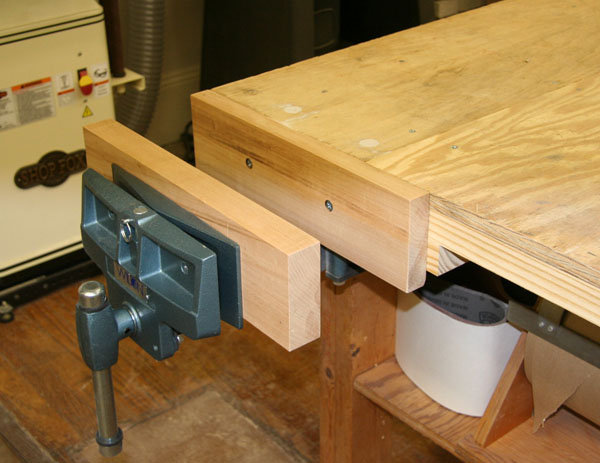
Front (face) vise
Mounted on the long front edge of the bench, usually front-left for a right-handed worker. It grips a board by its face or edge — perfect for sawing joinery, planing an edge, or holding a workpiece upright. This is the first vise almost everyone should buy.
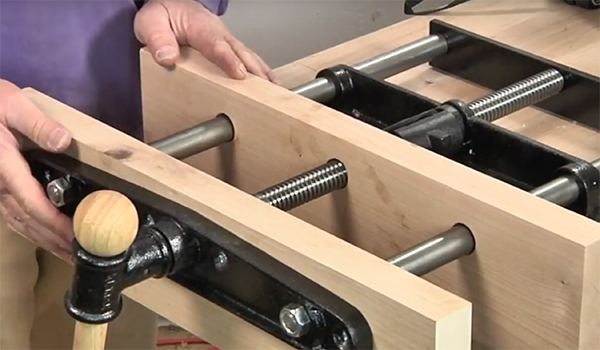
Tail (end) vise
Fitted at the end of the bench. On its own it holds smaller work, but its real job is to team up with bench dogs: raise a dog in the vise and one in the benchtop, and you can clamp a long board flat between them to work its top surface. Great for panels and surface prep.
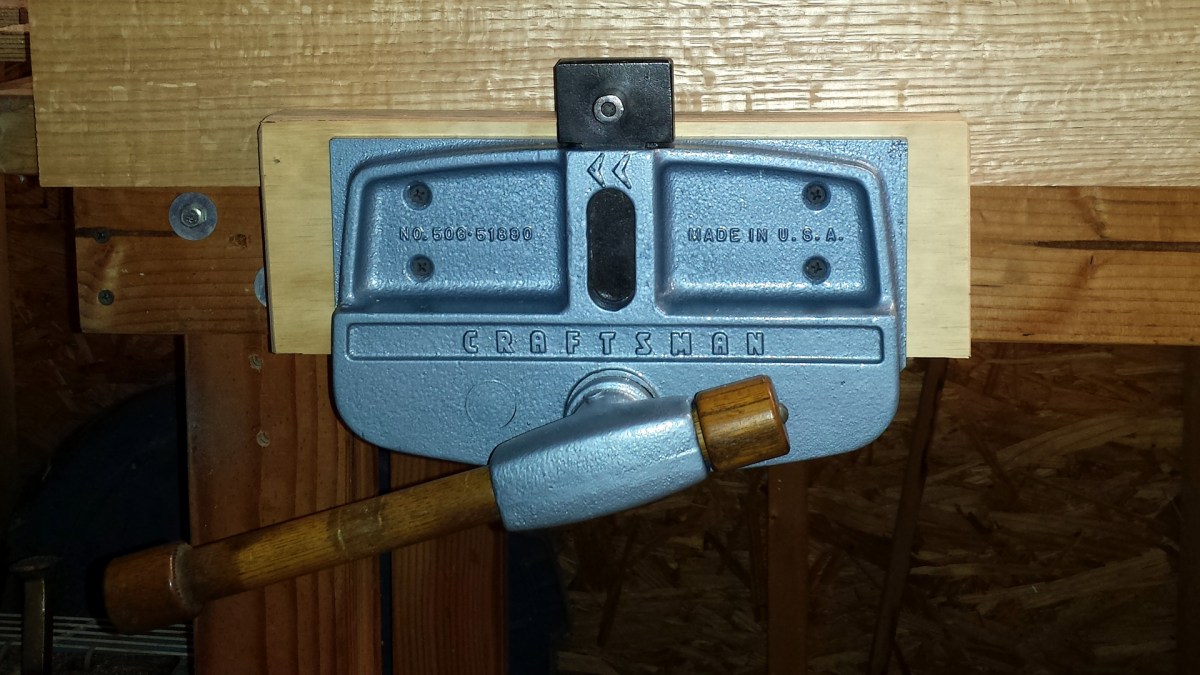
Quick-release vise
Not a separate location so much as a feature: a lever trips the screw’s nut so the jaw slides freely, then re-engages for the final clamp. It saves a lot of cranking on wide openings. Both front and tail vises come in quick-release versions.
Leg / patternmaker’s and machinist vises
A leg vise bolts to a bench leg for enormous clamping force (a traditional joiner’s choice). A patternmaker’s vise tilts and rotates to hold odd shapes. A machinist’s (engineer’s) bench vise has metal jaws for metalwork — useful in a shop, but its serrated steel jaws will mar wood unless you add soft liners.
How to size and choose a vise
- Jaw width — how wide the gripping face is. 7″ is fine for most benches; 9–10″ gives you more spread for wide boards and heavy work.
- Jaw opening (capacity) — how far the jaws separate; determines the thickest/widest stock you can clamp.
- Throat depth — the distance from the top of the jaws down to the screw. Deeper throat lets you clamp a board lower down without it hitting the screw.
- Material — cast iron is the standard; ductile iron is tougher for heavy use. Both are plenty for wood.
- Guide rods — twin rods flanking the screw resist racking (the jaw twisting when you clamp off-center). Look for them.
- Quick-release — worth it if you change setups constantly; skip it to save money if you don’t.
- Wooden jaw faces — nearly every metal vise is predrilled so you can bolt on hardwood liners (hard maple is ideal) that protect your work from the steel jaws. Plan to add them.
How to mount a woodworking vise
The short version: position the front vise so its fixed jaw sits just flush with (or slightly proud of) the front edge of the benchtop, mount it below the top so you can plane wooden jaw faces level with the bench surface, mark and drill the mounting holes, and bolt it up tight with washers and lock washers. Mount it low enough that the wooden jaw liners can be trimmed flush to the benchtop, and check that the handle clears the bench legs and aprons through its full swing. For a right-handed worker, front-left is the conventional spot; a tail vise goes at the right end.
Frequently Asked Questions
What size woodworking vise do I need?
For a general home-shop bench, a 7″ jaw front vise handles most work. Move up to 9–10″ if you regularly clamp wide boards, doors, or heavy stock. Jaw width matters more than raw opening for everyday holding.
Front vise or tail vise first?
Front vise, every time. It grips boards for sawing, planing, and joinery — the bulk of bench work. Add a tail vise later when you want to clamp boards flat on the benchtop with dogs for surface work.
Do woodworking vises come with wooden jaws?
Most metal vises ship with bare cast-iron jaws that are predrilled for you to bolt on your own hardwood faces. Add hard-maple liners so the steel doesn’t dent your work — it’s a quick, cheap upgrade and essentially required for woodworking.
Can I use a metal (machinist’s) vise for woodworking?
In a pinch, but its serrated steel jaws will mar wood. If it’s all you have, clamp soft wooden or leather pads between the jaws and your workpiece. For real bench work, a dedicated woodworking vise with smooth, linable jaws is far better.
More bench-shop guides
A vise is one piece of the bench setup. Once stock is held, flatten it with the best cordless planers and our wood planers guide, bring it to finish with the right wood sander, and glue it up with the best wood adhesives. New to the shop? Start with our comprehensive guide to woodworking tools.